ElectroHarmonograph
Contents
The ElectroHarmonograph
A Harmonograph is 19th-century mechanical device which draws geometric patterns based on the motion of pendulums. (For a real example, see Marie-therese's Maker Faire project - A 3-pendulum Harmonograph. Also, search youtube for videos like this one) By adjusting the physical parameters of the device, and initial conditions of the pendulums, you can vary the patterns it can make.
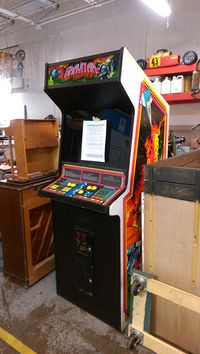
I happen to own a color-vector coin-operated game from the 1980's - Atari Gravitar. Unlike a raster monitor, this type of vector display technology steers the CRT's electron beam around to draw an image, not unlike a giant oscilloscope.
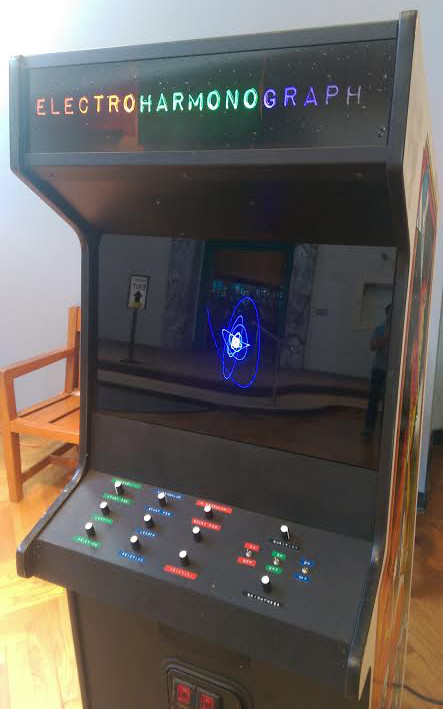
After seeing youtube videos of the mechanical Harmonograph, I came up with the crazy idea that I could design electronic oscillator circuits to act like pendulums, generating electric signals to drive the vector display. The pattern which would be generated on the screen would be very much like the mechanical version. Hence the name ElectroHarmonograph. This was displayed as part of Maker Faire Detroit 2015.
The user can adjust a bunch of knobs and switches to control the parameters of the Electroharmonograph, such as pendulum length, starting position, etc. Varying these parameters allows the user to explore, interactively, the effects of making changes which would take time with a conventional harmonograph. Some of the patterns are very 3D-like.
The game cabinet provides an ideal housing to use for the device.
Raw Video
Documentation
Presentation
File:EHG-DPM Presentation.pptx
Schematics
Board Pics
Progress Log
June 2015
Created Google Drive folder to house documentation. Ordered parts for vector monitor high voltage PCB repair.
Week of June 8
X and Y Pendulum oscillators working in LTSpice simulator. Will have to use modified version of X/Y type oscillator for Rotary pendulum. The actual math behind 2D pendulums is complicated! Ordered a ton of TL084 Quad op-amps. Some ideas for the Marquee. Also, the game was moved to the i3 space.
Week of June 15
Became a member of i3detroit! I have needed to fix an issue with the game monitor for quite some time, it had "shaky" vectors - the display was a little bit unstable. For several reasons, I guessed that the problem was with the high voltage PCB driving the monitor. During the week of June 15th, a bunch of parts were replaced on that board, and some bad solder joints were reflowed. (Thanks to Marie for noticing the bad solder joints.) As a result, the display is working 100%!
Week of June 22
The main sections of the design are now coming together...
Power Supply - need +-15V regulation, copying simple regulator circuit from original Gravitar game. Maybe some other regulators will be needed
Pendulum Circuits - X (Linear), Y (Linear), and R (Rotary) pendulums. They operate in two modes controlled by analog switches: "Retrace mode" keeps them frozen at fixed initial conditions - this is needed to retrace the beam to the start position. In "Run Mode" the op amp circuits act as damped oscillators as the beam is drawing the pattern. A number of external circuits control the pendulum length (frequency) and damping values.
Frame Generator and Delay circuit - this controls the timing of the "Retrace vs Run" for each oscillator, and there is also a provision to Delay each of the oscillator triggers a little bit to vary the relative phase between them. Hopefully I can estimate the beam velocity well enough to determine when the beam has slowed down near the middle, and trigger the retrace automatically.
Mixer/Driver - This will add the signals from each of the pendulums and drive the monitor directly. Maybe a clipping circuit too. And I just realized I will need a pincushion correction circuit - Gravitar does this on the game board.
Color controls - It seems like I should use color creatively, but until I have a better idea I guess I'll just let you turn on/off the 3 primary color beams manually?
Open Issues - Will the beam speed be fairly consistent with the requirements of the monitor? Will the display get a lot brighter in the middle as the beam slows down? Will I need some kind of velocity compensator circuit to dim the beam as it slows down in the middle?
I hope to start building a prototype circuit soon!
Week of June 29
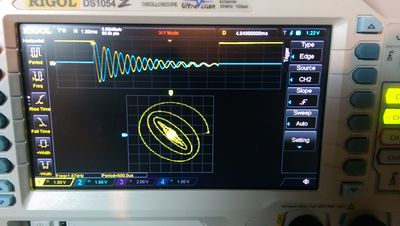
I started building a test oscillator on a solderless breadboard, and it started doing the right thing on an oscilloscope in X-Y mode, more or less. I realized I can use a +-8V supply and my op-amps and analog switches should be happy with that. And the awesome i3 e-lab had a 7808 and 7908 regulator in stock!
I started work on a Python simulation of the ElectroHarmonograph (Virtual Electroharmonograph?). After taking for too long to find a really stupid bug, it works the same as the test circuit and LTspice. I hope to have the simulation to show at Maker Faire as well.
I set a new 2nd place high score in Gravitar :)
Finally, I started building the real protoboard. I'm almost done with the +-8V regulator and it will plug directly into the Gravitar PCB connector. On my next visit to i3, I should be able to finish the Rotary Pendulum oscillator, plug it into the game harness, and see what it looks like on the arcade monitor.
So...I spent way too much time getting the +-8V regulator circuit to work. It turns out, the ground reference between the +8 and -8 is not labelled GND - it's disguised as "+5 RETURN". So after tearing my hair out for a while, I finally have a working supply on the board, and am almost finished with the first "rotary" oscillator.
Week of July 6th
The rotary oscillator is built on the protoboard. Got it up and running on the bench on Monday, and the waveforms look great. Having a small problem with the circuit that applies the initial conditions, but I understand the problem and think I have a good fix for it.
Week of July 13th
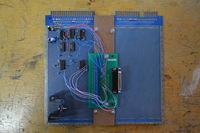
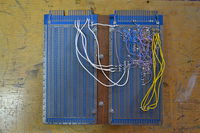
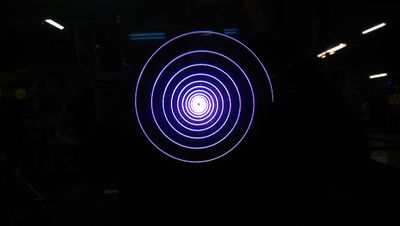
Well, the last two and a half weeks of development were kind of a blur. I'll try to list what happened next as best I can. I tried the better version of the test oscillator circuit which uses 4 op-amps and 2 analog switches. As long as you're not too close to the amplitude rails, it applied the initial conditions and worked fine. If not, it tends to distort/clip a bit, but it's still not too bad. There are 2 card-edge connectors on the main board, so I found a 2nd vector board and used a scroll saw to trim the card edge to fit the second connector on the game harness. Now I could send video signals to the game. I wired up these two vector boards with jumpers between them, and plugged the single rotary test oscillator into the game, with all three colors driven together. It worked really great and made a perfect white spiral!!
Week of July 20th
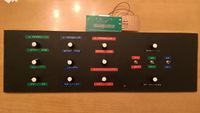
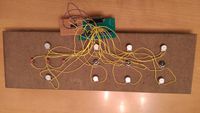
Next, I found that i3 had a pair of DB-25 parallel breakout boxes, and parallel cables. I planned to use them to make the control panel interface a lot easier. I created the final mechanical version of the main board by screwing together the 2 vector boards, an MDF spacer board, and one of the DB-25 breakout boards. This main board replaced the original Gravitar game board nicely. On this main board, I built up two more oscillators (for X and Y). At this point X worked fine right away, Y had an issue. Since I didn't have a control panel, I used fixed resistors to test the control panel wiring. I added a small perfboard to the other DB-25 breakout board, so I could put some op-amp followers at the control panel. Then I build summers for the Rotary X+X, and RotaryY+Y. Since I didn't have a control panel, I used fixed resistors to test the control panel wiring. I figured out how to make a control panel from 3 pieces of MDF. I found a set of pots and knobs at Mouser, and ordered a ton of them and paid way too much to have them arrive 2 days before maker faire! I also ordered a old-school embossing label maker for the retro-looking control panel. I tried to get some glass for the marquee, but settled on plastic instead when I couldn't get glass. With 2 days to go, I laser cut the MDF for the control panels, and I offloaded the creation of the marquee to another i3 member. The cabinet was reinforced, and some wood blocks were cut to keep the control panel from sagging. With one day to go, I had to move the regulators in order to fit a heat sink. I wired up the entire control panel, and found the remaining 2 wiring issues with the Y oscillator and the mixers. At 3:00AM I found a leftover wire on the control panel PCB was causing the last issue, and I removed it. In the morning the knobs were put on, and the labels for the controls at the show before it started. It ran flawlessly for the entire Maker Faire weekend and was a big hit!
Thank you to Marie-therese, Nathaniel Bezanson, and Evan Allen for your help and support!
