Laser Penetration Test 1
Laser Cutter Penetration Test 1
These are the results of the first of a series of tests to devise a table of speed and power settings to use for cutting various materials to different depths.
For this round I used a single material, a piece of 2-by-6 left over from
the framing of the new E-lab. I created a file that would cut a matrix of
24 straight lines, of four power settings and six different speeds. It was
intended that these cuts would NOT penetrate the piece. Instead, the depth
of the slot actually created would be measured.
File:PenTest-20240517.ecp Lasercut ECP file
File:PENTEST-20240517.INI" INI file
After some adjustments I ran the first test.
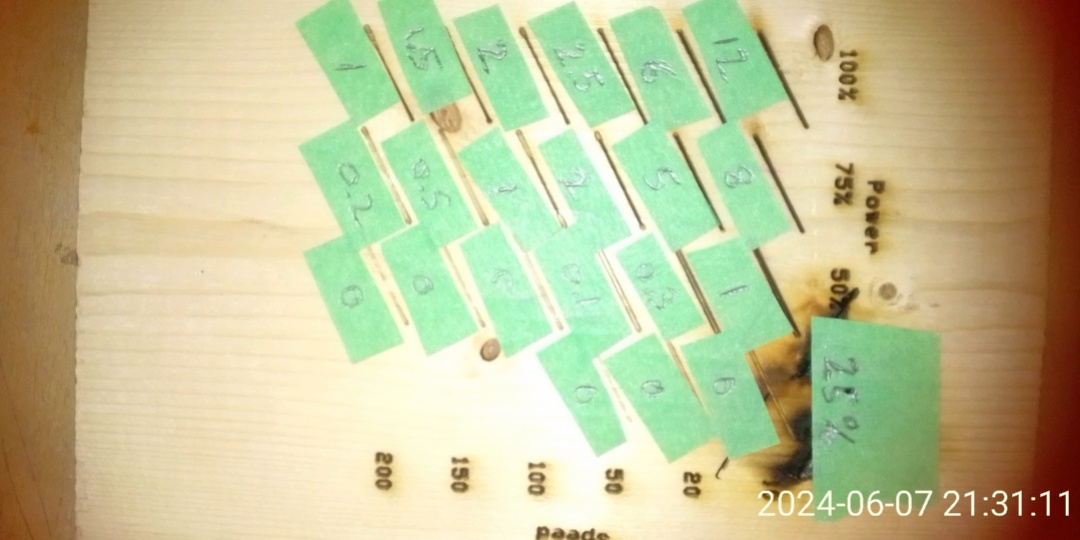
Seeing that the lowest power settings and highest speeds didn't touch the material, I decided to turn the piece over and slow down the head. Since it seemed the easiest course of action, I simply cut all speeds by a factor of 10.
As can be seen in the previous photo, four of the holes went all the way through. The rest cut partway through as intended.
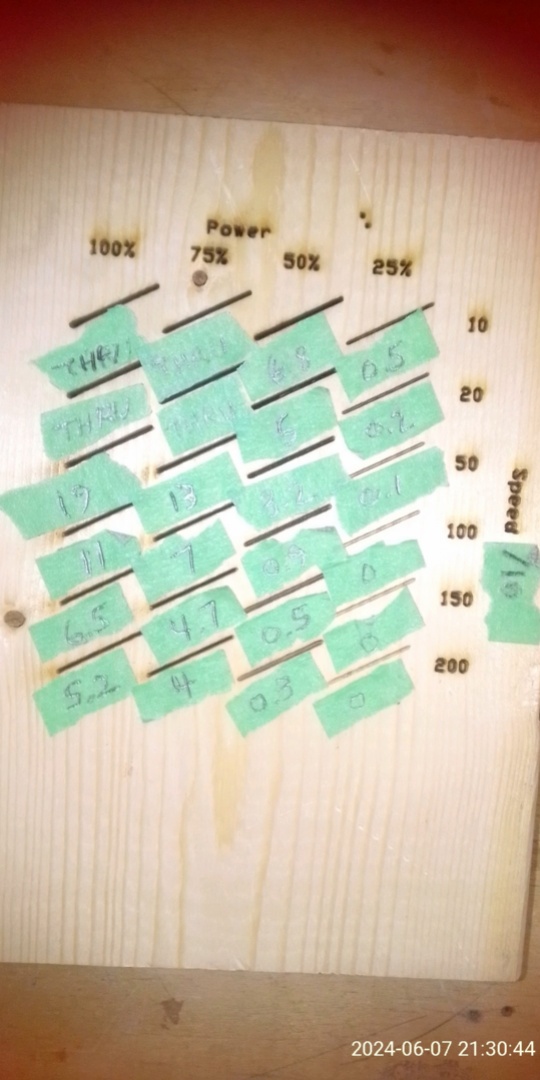
I got a useable gage by putting a millimeter scale on a piece of index card stock, and got some semblence of measurements for all the non-thru holes.
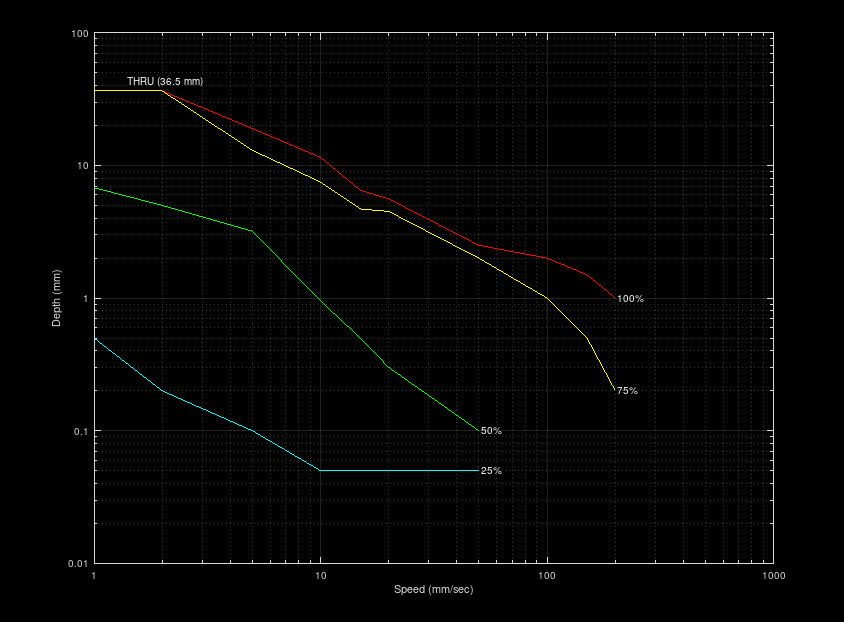
I finally settled on using Octave, an open source MatLab replacement, to organize the data into a graph. Two of the speeds (10 and 20 mm/sec) were done twice; I used the average results for these. To accommodate the nature of the log graph, I reassigned the holes that barely made a scratch to 0.1 mm, and the spots that the laser didn't even touch to 0.05 mm.
File:Laserdepths.m Octave script file
Notes:
- For this project, it was necessary to use an unprecedented number of layers.
Each line needed to have its own combination of speed and power settings. Attempts to do this in Inkscape and import the results invariably failed, all of the entities being compressed onto far fewer layers.
I finally had some success by getting a copy of Lasercut running on my own laptop. With this, I could create the file directly in Lasercut, which allowed considerably more layers. It was also possible to assign the layers their required speed and power settings and save the file.
- Lasercut's layers do not have numbers or names. Instead they have Colors. A
pallate appears at the bottom of the Lasercut window, with about 26 colors in no particular order, followed by 14 shades of grey, from dark to light, for 40 layers total.
- As shown by the THRU holes, it's possible for the laser to blast right through
a 2-by-6. Caution is advised, however, as the Speed 1 Power 100% slot showed smoke underneath the piece. Drilling the Speed 2 Power 75% slot seems to have worked okay. Thankfully, Lasercut refuses to accept a speed less than 1 mm/sec.
- The time required to reach any given depth by using 75% power and 100% power
appear to be within a factor of 2 or less of each other.
- The 25% power settings invariably cut to less than 1 mm depth. 50% power can cut
to almost 7 mm, but it's necessary to run the head exceedingly slowly in order to do so. These settings may be useful for shallow cuts of fine detail.
- These results are for but a single material: 2-by-6 framing lumber. It will
be necessary to run the same test on different materials, or construct a mozaic of roughly 3" by 3" tiles of allowed materials including a piece of the 2 by 6 wood for comparison.


