Sous Vide Journal – Terry W.
Session 1
I am going to try Sous Vide cooking. Which is vacuum sealing meat in plastic bags and putting them in a low temp bath (110-150F) for an hour or so. Google it. There are many references like this one…
http://www.douglasbaldwin.com/sous-vide.html
From wikipedia: Sous-vide (pron.: /suːˈviːd/; French for “under vacuum”)[1] is a method of cooking food sealed in airtight plastic bags in a water bath for longer than normal cooking times—72 hours in some cases—at an accurately regulated temperature much lower than normally used for cooking, typically around 55 °C (131 °F) to 60 °C (140 °F) for meats and higher for vegetables. The intention is to cook the item evenly, and not to overcook the outside while still keeping the inside at the same “doneness”, keeping the food juicier.
With traditional meat grilling you heat the outside of the meat at a temp of 300-500F until the interior reaches the correct temperature. For medium rare beef, that is 130F-140F, usually on the low side of 135F. So timing on the grill in this huge thermal gradient is critical, too little time and it is raw and subject to bacteria, too much time and its overdone and subject to taste like shoe leather. You have a window of about 1 minute, and the meat must be continually monitored.
In Sous Vide because your outside temperature is the same as your target inside temperature, you have a MUCH larger window. Once you reach the internal temp, you need to hold it long enough to kill bacteria. After that, you can’t overcook it, because you can’t put something in a waterbath at 131F and have it reach an internal temperature of 145F. Laws of Thermodynamics and all that… The much longer window means that as you coordinate the “perfect serving time” with other dishes, the meat is no longer so critical, but becomes your most time-flexible dish.
The second reason for Sous Vide is that long cooking times gives you the ability to easily cook cheaper, or trickier pieces of meat to tender perfection. Top restaurants sous vide cook meals for hours and days. (Google “sous vide” and “snooty restaurants”).
So I wanted to start and see if Sous Vide was for me.
There are zillion dollar commercial units which keep the water bath circulating and stable to with .001 degree. There home units costing a few hundred dollars which keep the water bath good to a degree or so. There is also several people who simply used hot water and a beer cooler and went for it. I wanted to do a quick and dirty hack to see if I liked doing it. So I went for….
SOUS VIDE LEVEL 1
I didn’t splurge on the fancy plastic beer coolers, like this….

That would require going to a sporting goods store. When I decided to do it I was grocery shopping. Since I was already in the grocery store and they had these….

for $2.99, I grabbed one and got some NY strip steaks and I was cooking.
My first issue was could this $2.99 cooler keep the water at a constant temp for about 1 hour? I needed something to monitor the water temperature with the lid closed to prevent cooling. So I thought, what if I ordered one of those wireless BBQ thermometers and put it in a ziplock bag and chucked it in the water. Then I could monitor the water temp without opening the lid. Well…. those thermometers always had a needle probe which could puncture a bag and they cost $40-$80. There were PLENTY of indoor/outdoor wireless thermometers pretty cheap, and I didn’t need the instant read of a meat thermometer, so…..
 I chose the LaCrosse Wireless Indoor/Outdoor thermometer because I could get some specs on it and its Max temp is 140F. I figured that was ok, but marginal. The package from Amazon came today (which is why I went to the grocery store today). I unpack the thermometer and get it going. I put the sensor in a normal ziplock bag (actually the cheapy store brand) and put in 2 silver dollars for ballast, try to get the air out and stick it in some water. I also have an old mercury meat thermometer. I fill the cooler with hot water and chuck both in, keeping the lid off so I can see the meat thermometer. The meat thermo says 126. My outdoor thermometer say 74. Oops.
Lid back on. I go away for a few minute to fix my son dinner and come back and the I/O thermometer is reading 124.5. Hooray!!! Guess it just needed some time. I open the top to peek and the meat thermometer reads the same. The I/O thermometer works.
Now I have to bring up the water temperature. I boil some more water and add it to the cooler. It was a little hot, meat thermo is reading 165 for the total bath. I/O thermometer is blank. I figure its out of the 140F range so I add some cold water to get it down to 135. Still no reading from i/o. I wait a bit and nothing. So I fish out the bag. The bag was filled with water. Oops.
I disassemble the probe, remove the batteries and set it aside to dry. Next time, no store brand bags. Ziplock only.
I get the NY Strips from the fridge and cut off a 1/3 piece and season it up and put it in the ZipLock ™ Vacuum Bags and start pumping. This is FUN. and it works AMAZINGLY well.

The table for times to get your steak Medium Rare and Bacteria Safe is given in the book cited above. It depends on thickness and shape.
Thickness/Slab-like/Cylinder-like/Sphere-like
5 mm 5 min 3 min 3 min
10 mm 14 min 8 min 6 min
15 mm 25 min 14 min 10 min
20 mm 35 min 20 min 15 min
25 mm 50 min 30 min 20 min
My steak is between 20mm and 25 mm by eyeball (I left my meat micrometer at i3) and “slab-like” in shape so I go for 90 minutes. It is supposed to be a BIG window so I want to give it a little on the “less bacteria” side.
I fill the cooler with hot water to get the temp to 135 by the meat thermometer and chuck in the steak. And set the timer for 90 minutes. I will see what the temp is when I open it up after 90 and make some decisions.
In the mean time I season all the steaks, put them in vacuum bags, pump it out, and put them in the freezer. That is going to be my standard Mode of Operation. Season, bag, freeze. and when ready to eat, chuck it in the water for X. I am going to have to figure out how long X is for frozen steaks.
(time elapses) I type this as I wait. 55 minutes to go.
(time elapses) In reviewing the chart, I am going to peek after 50 minutes (which is Tminus 40). 12 more minutes…..
(time elapses) In reviewing my prior post I decide to peek now. (Was that a surprise for you readers??)
Temp is about 127. Not bad, but a little low. So I am heating up some water to kick it up a bit. I might have to go to the sporting good store tomorrow….I poured in a cup of boiling water at the Tminus 49 mark. Meat therm reads 131.
Note: Meat therm is in the water, not the meat. That would be cheating.
(time elapses) Peeked at Tminus 17. 128F. I am going to add a bit of hot water, but the unit is staying pretty stable. Looks like it was $2.99 well spent
(time elapses) At T-Zero it was about 126. I thought that it was under 130 for too much of the time. If I understand how this works, adding more time at 135 won’t overcook the meat, so I added more hot water and brought it up to 135 this time. I am going to give it 15 minutes and then peek.
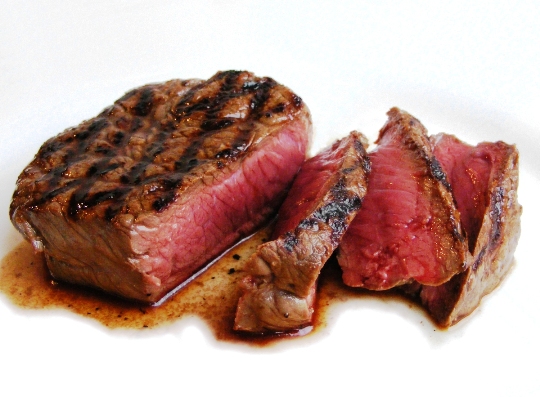
(time elapses) OK. I waited 15 more and then ate it.
It was probably less done that I want, maybe rarer medium rare.
I don’t have a torch yet, so it wasn’t seared on the outside.
But boy was it tender.
NEXT TIME – Sous Vide Level 2
– However the spicing was overspicing. I have read that vacuuming intensifies the seasoning. It really does. Maybe 2x or 3x. I need to cut it down next time, but the ones in the freezer are already done.
– I have a needle meat therm coming so I will test before I eat again at least until I get the timing down.
– I should worry about stirring the water for even temperatures.
– I will have to figure out how long to cook a frozen steak.
– I need to keep the water temp higher at the start. I got sloppy and didn’t get it as high as it should be. I want to start at 136.
– Next time I have to take a picture before I eat the evidence.
Photos courtesy of 3.bp.blogspot.com, imgc.classistatic.com, lematecocktailmix.com, themeparkreview.com and images.rcuniverse.com.
 It’s 3-14 and that means it’s time to make bad pi/pie jokes! Won’t you join us?