HOWTO Change the Thread on the Husqvarna Designer SE
This mini-tutorial describes how to thread the machine, put in bobbins, and rewind bobbins on the Husqvarna Designer SE.
To change the spool (embroidery) thread:
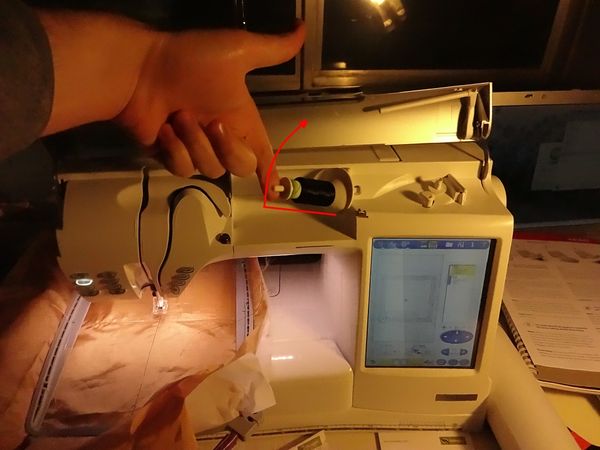
1. Raise the upper spool by gently pulling outward.
2. Snip the old thread right where it comes off the spool. Grab the thread end where it exits the needle. Pull the thread down and out of the thread path.
3. Pull off the old spool.
3. Put a new spool on the spindle.
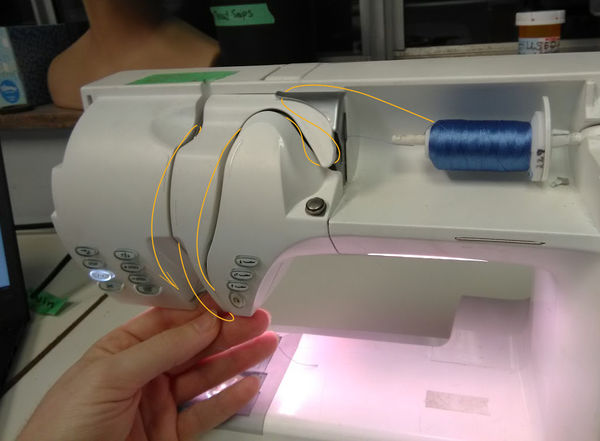
4. Pull the thread into the path indicated by the arrows. It should catch there. If it doesn't, snip the thread at the spool, pull the old thread out from the needle, and try again.
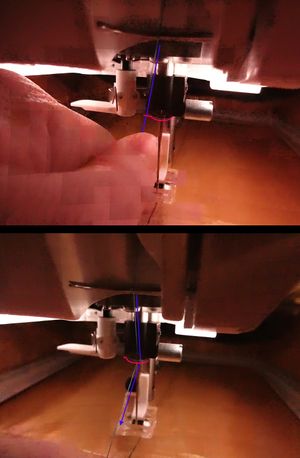
5. Be sure to pull the thread through the small metal loop just above the needle.
6. Thread the needle using tweezers or your hands. Pull a length of thread through, and place it to the rear of the needle.
7. Return the spool and spindle to the lowered position.
To change the bobbin (lower) thread:
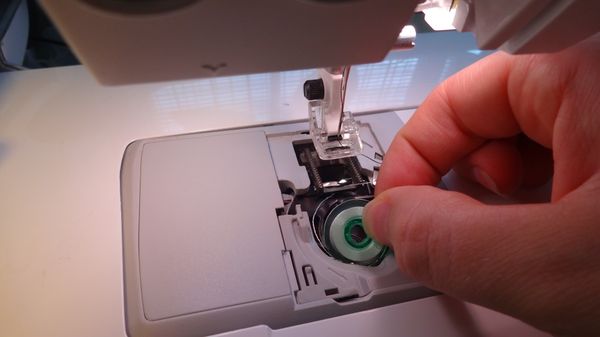
1. Pull off the clear plastic bobbin cover plate.
2. Pull out the round bobbin.
If the old bobbin is paper or cardboard, discard it. Select a new bobbin from the stock of pre-wound bobbins in the drawer of Husqvarna bobbins.
If you must have a different bottom thread, see below for instructions on how to fill a bobbin with thread using the Husqvarna's winding capabilities.
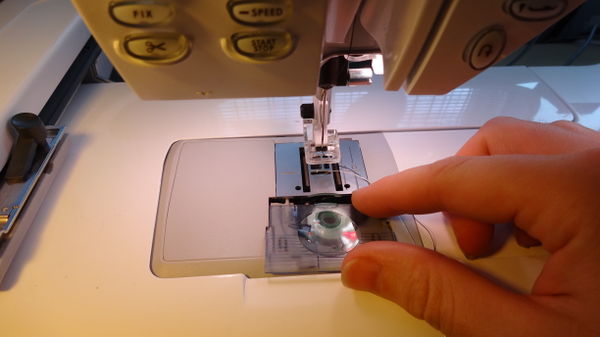
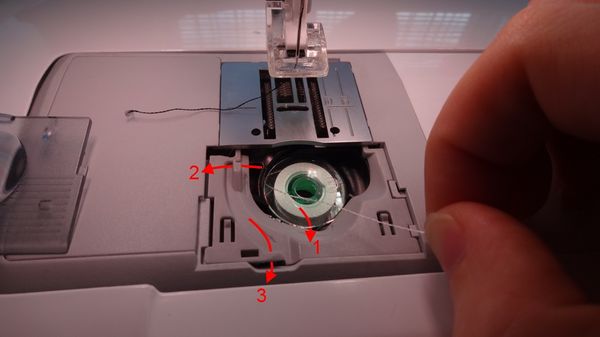
3. Place the spool in your hand. Grasp the thread end and pull to the left. The thread should unspool from the top of the bobbin. If it does not, flip the bobbin over.
Wind the thread into the slots as in the picture below, being sure to catch the metal thread tensioner in the bobbin case (1 in picture). There's no need to worry about where the thread goes after it's caught in the third slot. Replace all covers.
To wind a bobbin with thread
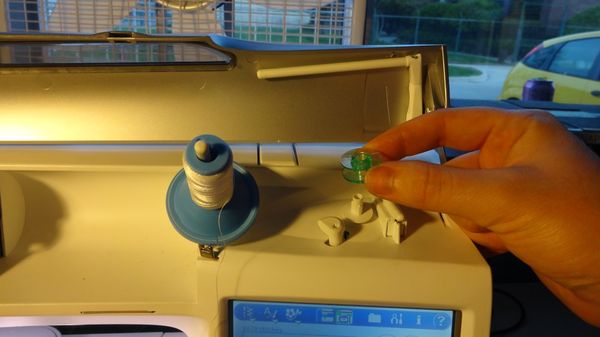
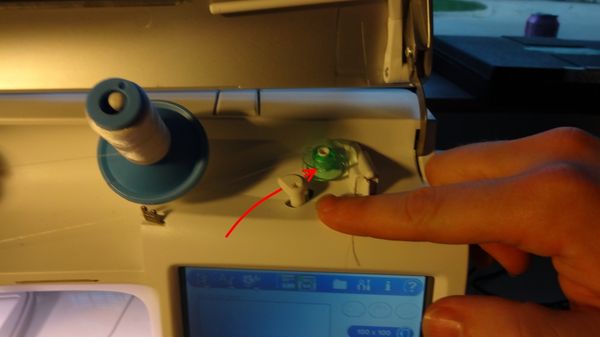
1. With the 'H' on the spool facing up, place an empty bobbin on the bobbin winder.
2. Place bobbin thread on the upper spool; rotate it into the upright position. (You may need to move the white disklike spool support up before you can move the spool.)
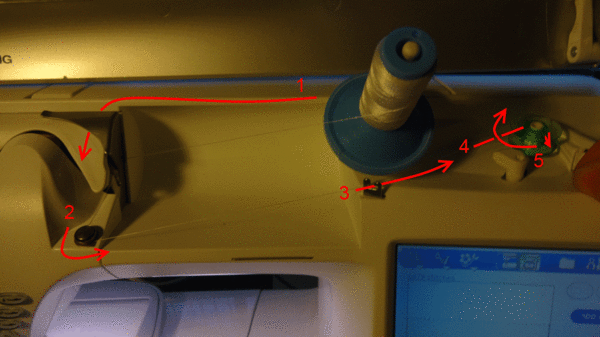
3. Run the thread in the path shown below. Finish by threading through the hole on the top of the bobbin.
4. Push the bobbin winder lever forward.
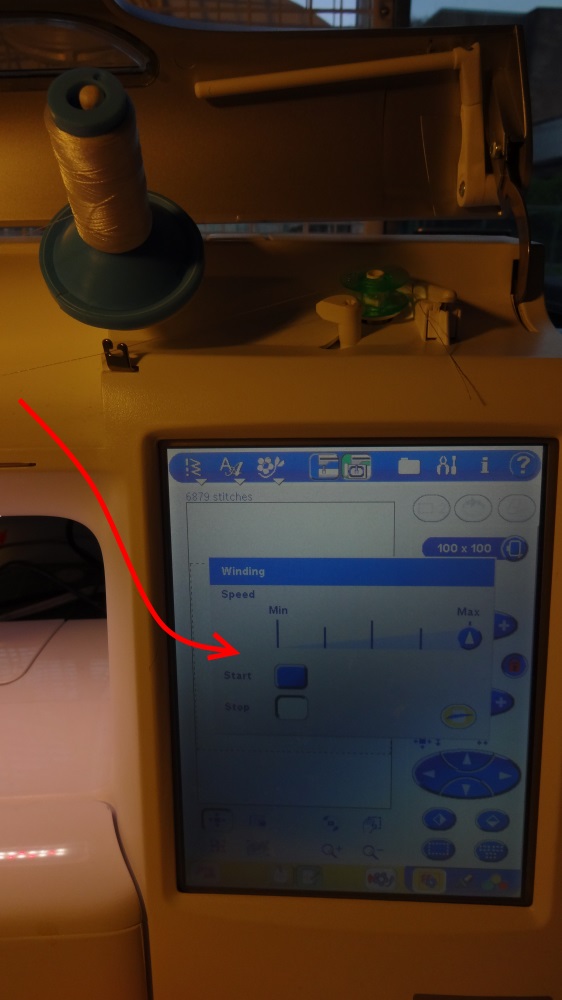
5. The winding dialogue will popup on the LCD. Adjust the speed to half, then press 'Start' to begin winding.
If the bobbin spins without engaging the thread, try grabbing the loose end and holding it still for a second.
